IKEA Fratka Backpack Tutorial
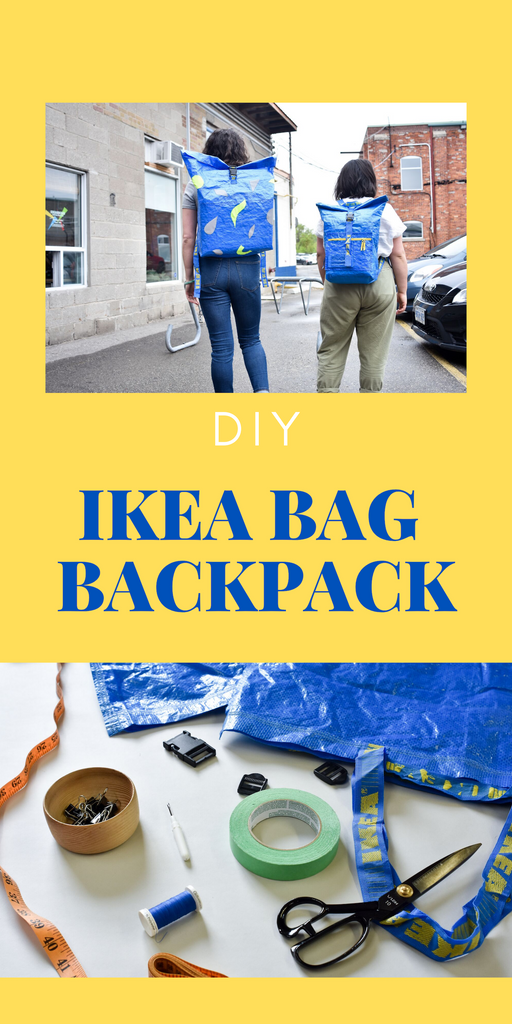
A few months ago my studio mate Ali asked me to help her turn a blue IKEA FRAKTA bag into a backpack. At any given time we have at least 10 of these bags floating around the studio. I use them to bring orders to the post office, store finished purses, carry my leather workshop supplies, and the list goes on. Every time I’m at IKEA I buy at least one more. You can never have too many Fraktas!
Ali has been know to use one as an impromptu backpack and wanted to turn one into a real backpack. Since I’ve got a lot more sewing experience, she asked me to help her out. We used two old bags we had lying around the studio, and kinda made it up as we went along. I had a lot of fun helping Ali, it reminded me of when I teach my Leather Workshops. The first bag turned out pretty great, and when Ali shared it online, people looooooved it! Everyone was asking how we made it, so we decided to make you this tutorial.
Here's what you'll need:
- Sewing Machine
- 2 Small IKEA Frakta Bags
- Blue Thread
- Seam Ripper
- Scissors
- Measuring Tape, or a Ruler
- Binder Clips
- Masking Tape
- Permanent Marker
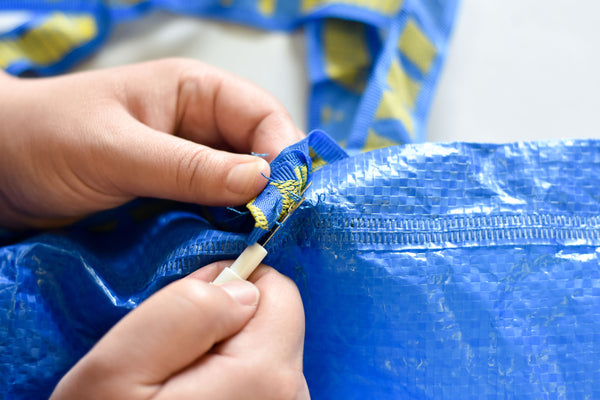
Turn the bags inside out. Use a seam ripper to remove the handles off both bags, being careful not to damage the bag or handles.
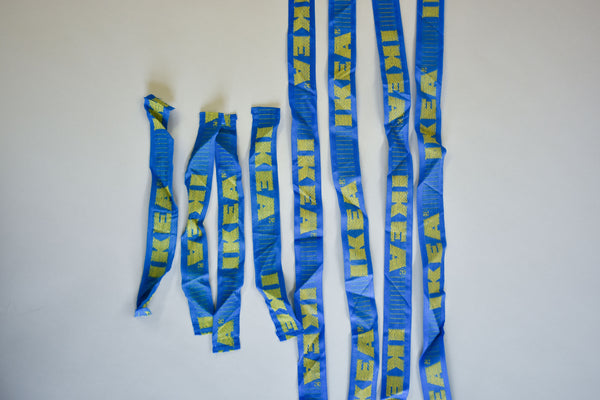
You should have 4 short straps, and 4 long straps.
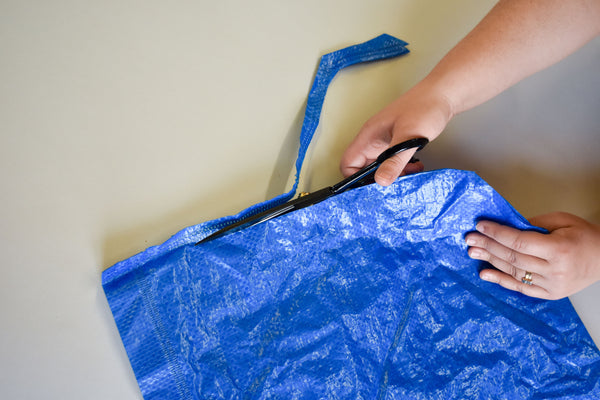
Cut right along the side seam, and angled bottom seam of the bag. Repeat on the three remaining seams of the bags.
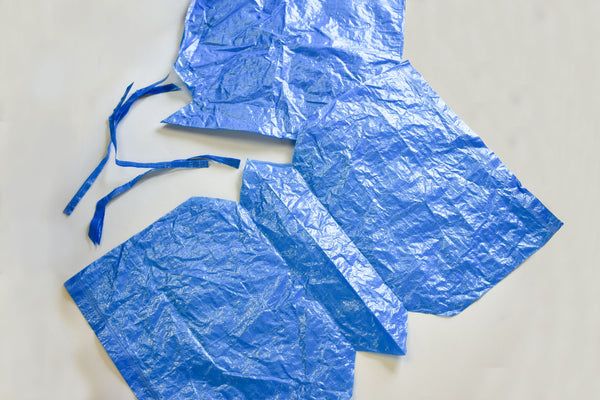
Now you should be able to lay the bags out flat like in the above photo.
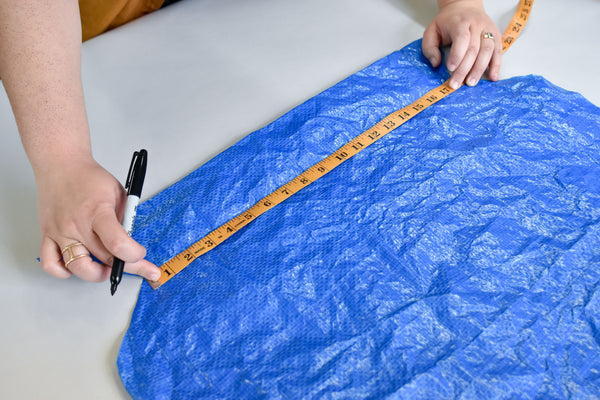
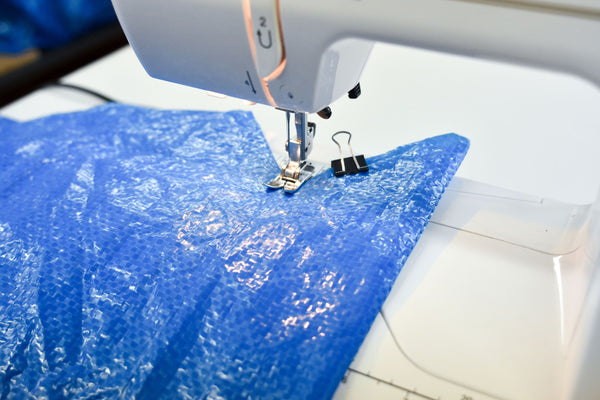
Take one of the bags, and fold it in half, and sew along the narrowest crease at the bottom with a 0.5” seam allowance, and then again with a ⅜” seam allowance so that the seam is extra strong. We traced the line with a sharpie first to make it easier to see when sewing.
Once you’ve sewn along the crease cut off the excess fabric at the bottom of the bag, as shown, leaving a 0.5” seam allowance. Then cut the hem off the top of both sides of the bag, where the handles used to be. Be sure to save this extra fabric you’re going to use it later.
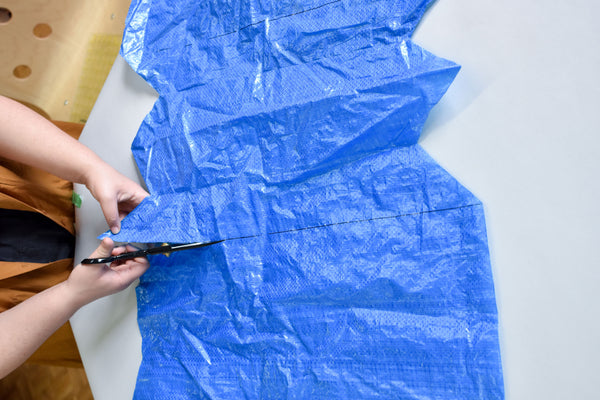
Take the second bag and cut along the longest edge on both sides, so that you have two rectangles measuring approximately 18 x 14
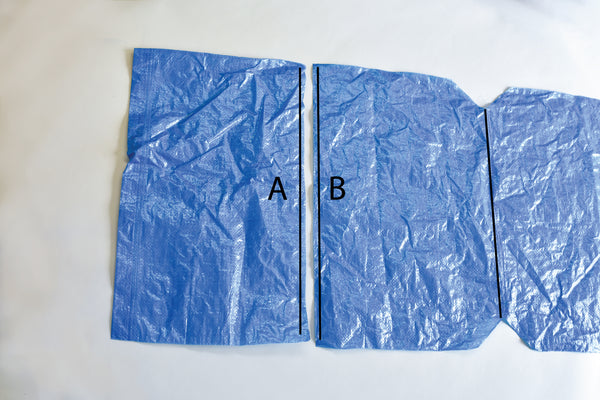
You should have three pieces, the centre piece that you sewed, which is now the base of your backpack, and the two rectangles you just cut. You’re going to use these rectangles to extend the length of the bag, by sewing Side A to Side B.
Place the rectangle overtop of the backpack base with Side A and Side B aligned, use clips to hold the two pieces together, and sew with a 0.5” seam allowance. Make sure you’re not sewing through the hem edge (where the handles used to be) of the rectangle piece, and that your seam is on the same side as the seam on the base of the backpack. This way when we turn the backpack inside out, all the seams will be on the inside.
Repeat with the other rectangle.
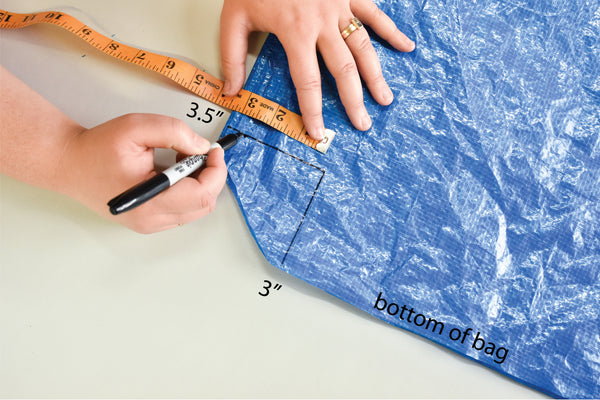
Take the backpack, and fold it in half. Draw two lines to form an L shape, 3.5” from the side of the bag, and 3” from the bottom to create a square in the bottom corner. Repeat on the other side.

Cut along these lines so that your bag looks like this.
Cut down the sides of the bag so that it measures 18 by 29”. Use a straight edge as a guide to make sure everything is nice and square.
Sew with a 0.5” seam allowance along both sides of the bag.
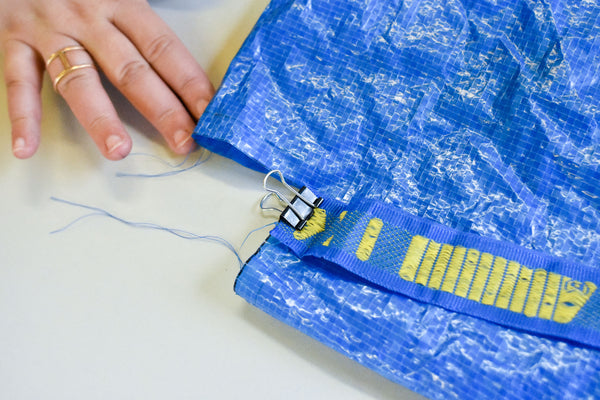
Turn the bag right side out (so that the seams are on the inside). Place one of the short straps you took off the bag earlier on the top edge of the L that you cut out off the corner, with bottom of ikea strap facing bottom of bag. Clip the strap to the bag along this edge, but only to one layer of the fabric.
Repeat on the other side.
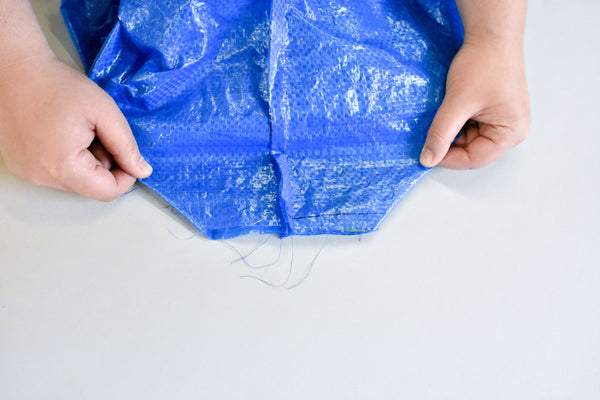
Turn the bag inside out. Fold out the corner so that it looks like the above photo, taking care to keep the strap from moving. Sew along this edge with a 0.5” seam allowance, and then again with a ⅜” seam allowance so that the corners are extra strong.
Turn the bag right side out. Your straps should now be on the outside of your backpack at the back corners. Those corners are back of the backpack where it will touch your back.
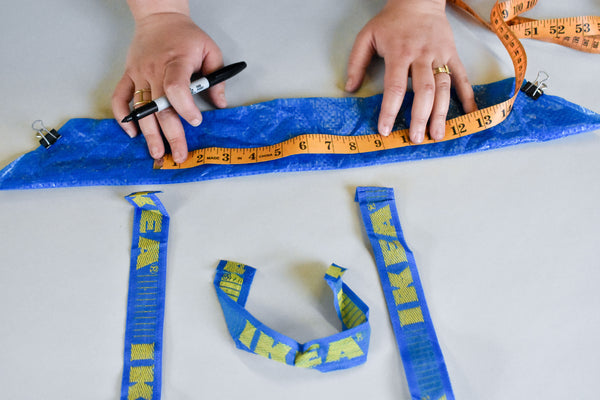
Now you’re going to make a patch using the leftover fabric, which will reinforce spot on the bag where you’ll attach the top straps and handle.
Fold the fabric in half, and measure a rectangle along the top folded edge that’s 9” x 2.5” ( 9” x 5” when unfolded) Cut the patch out, and then sew along the cut edges leaving a 2 inch gap along the centre of the longest edge. Turn the patch inside out through the gap you left along the edge, and fold the seams inside. You don’t have to sew this hole closed yet, we’ll do that when we attach the patch to the backpack.
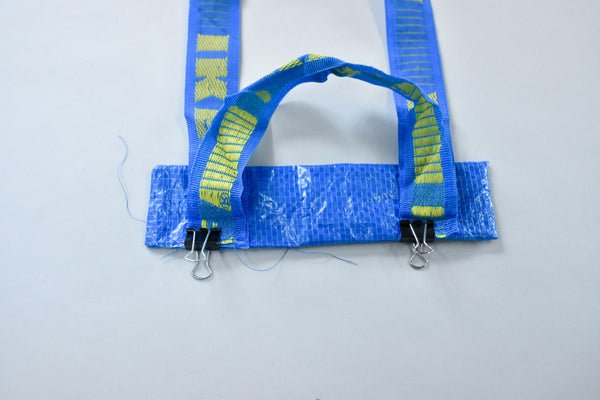
Cut one of the short straps down to 11” long, this will be the handle of your IKEA backpack. Then take two long straps, the short strap, and attach them to the patch as shown.
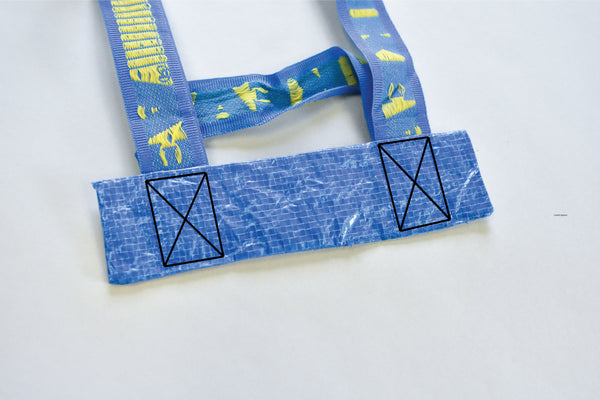
Sew the straps to the patch using an x-box shape as pictured.
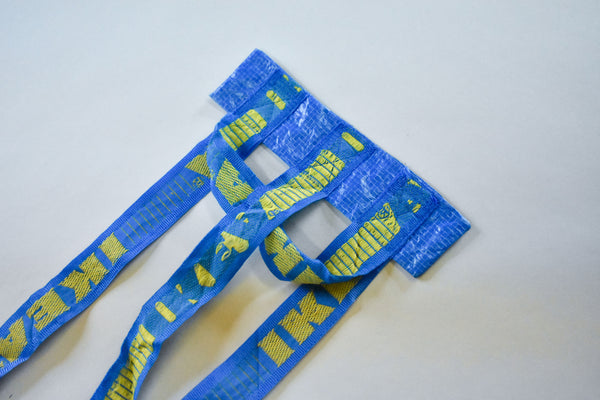
Take another one of the long straps and sew it to the centre of the patch using an x-box shape.
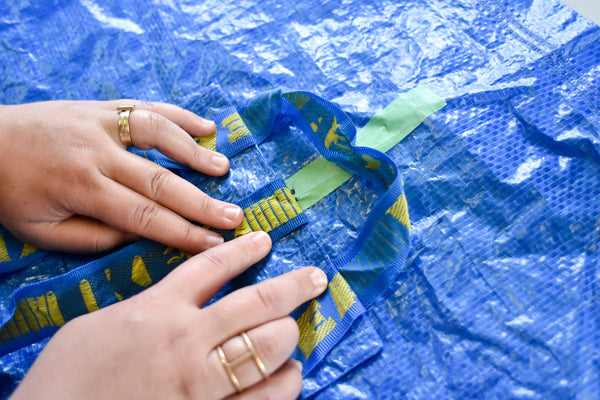
Measure 9” from the top of the bag, on the back side. Find the centre of the bag by folding it in half. Mark this point. Attach the patch to the back of the bag just below this point, aligning it so that it’s in the centre. Make sure your handle is facing towards the top of the bag, and the patch is blue side up, so that you can’t see the raw edges of the straps. Secure in place using masking tape. (Pins will damage the fabric of the bag.)
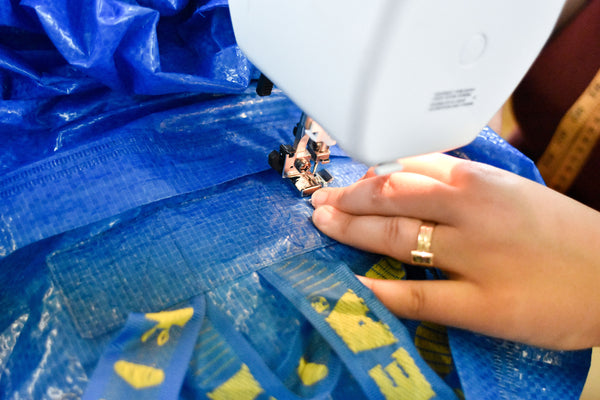
Sew the patch on to the bag about a ⅛” from the edge along all sides, removing the tape as you go.
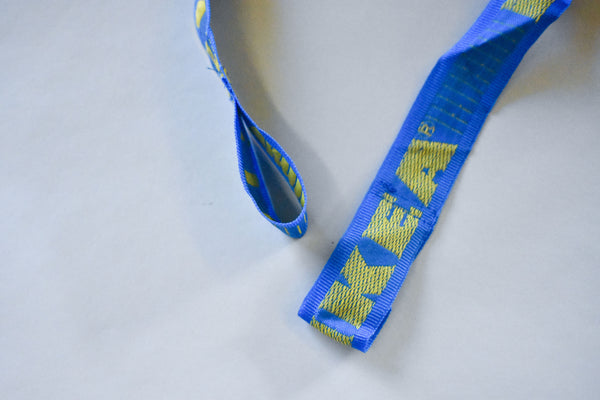
Cut down the two outer straps so that they measure 22” long. Fold the end of the long strap to create a small loop (about 2” long), and sew it in place. Make sure to fold the raw edge under, and use a double row of stitching for extra strength.
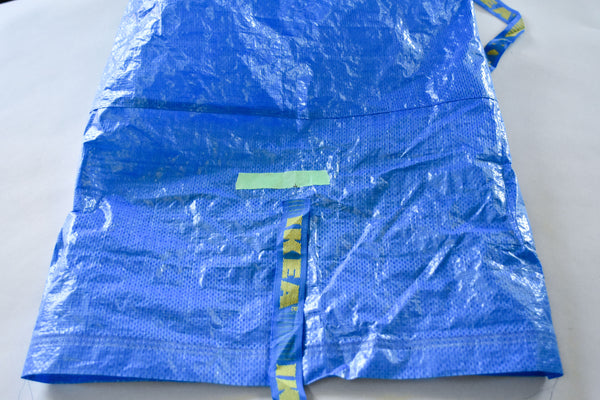
Measure 16” from the top of the bag on the front side. Attach the last remaining long strap at the with a x-box stitch, being sure to fold the raw edge under.
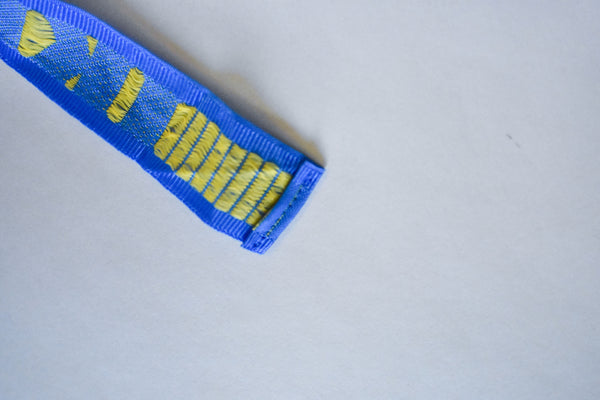
Finish the edges of all remaining straps so that they don’t fray. You can either burn them with a lighter, or fold the ends of the straps back on themselves twice and sew in place.
Put your bag on, and thread the bottom straps through the loops on the top straps. Pull to adjust to your desired length, and tie in place.

You’re all done! Enjoy your new bag.
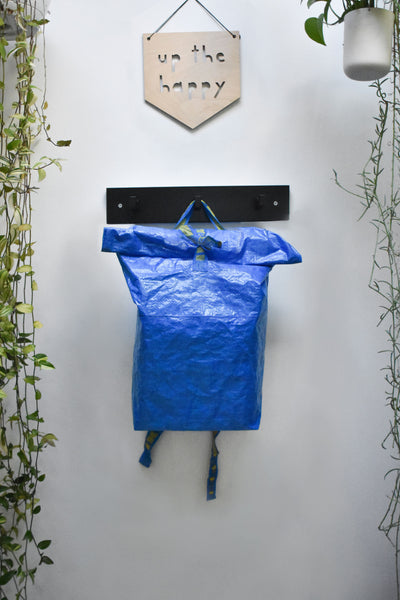
BONUS: How I Customized My Bag
I knew I wanted to add a few more features to my IKEA Backpack, so that I would end up using it more. And I did, It was my go-to beach bag this summer. I added an adjustable buckle to the front of the bag, so that it’s easier to open and close. I adjustable sliding buckles to the straps, so that I can tighten and loosen the straps just like on a regular backpack. I also added some patches on the inside of the bag to reinforced the spot where the straps connect. I knew I be putting beach beers in this bag, and didn’t want the straps to My favourite addition is the pocket on the front! It’s the perfect spot to stash my phone at the beach, and it looks so cute. I made the pocket using of IKEA’s new zippered FRAKTA bag. I just cut a square out of the zipper section of the bag, attached some binding, and sewed it to my bag. I love the way the yellow zipper pops!
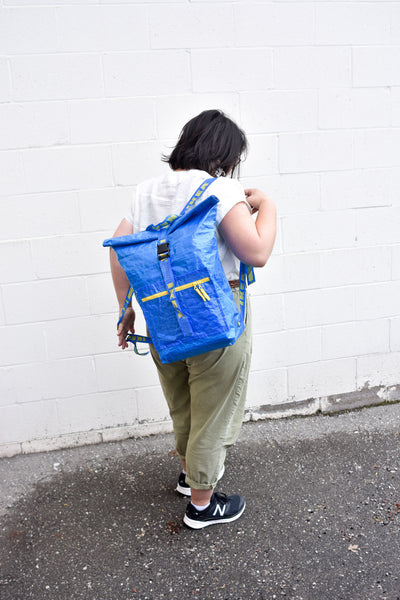
Ali and I each decided to customize our bags to better suit our needs. I used more advanced sewing techniques to add buckles and a pocket. Ali made her IKEA backpack more cycling friendly. Check out her tutorial post, for instructions on how Ali customized hers.
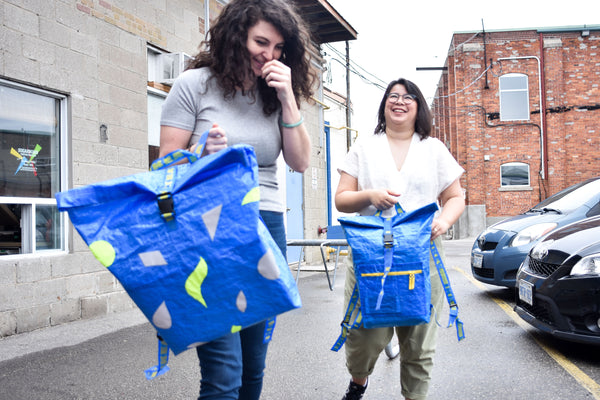
I had so much fun making, and customizing these backpacks with Ali. If you make one, be sure to share it with me on instagram.
Happy Sewing!


Comments